Publishing your first npm package might seem complex especially as a student or junior developer, but it’s simpler than you think. This guide will walk you through every step, ensuring your package is live on npm in no time. Whether you're building a utility function, a library, or a CLI tool, this post is your go-to resource.
Step 1: Prerequisites
Before diving in, make sure you have:
- Node.js and npm installed: Download the latest version of Node.js from nodejs.org. npm comes bundled with Node.js.
- A basic understanding of JavaScript: Familiarity with ES6 modules will be helpful.
- An npm account: Create one here.

Step 2: Set Up Your Project
- Create a new folder for your package:
- Open your terminal and run:
- mkdir my-first-package
- cd my-first-package
- Open your terminal and run:
- Initialize npm in your folder:
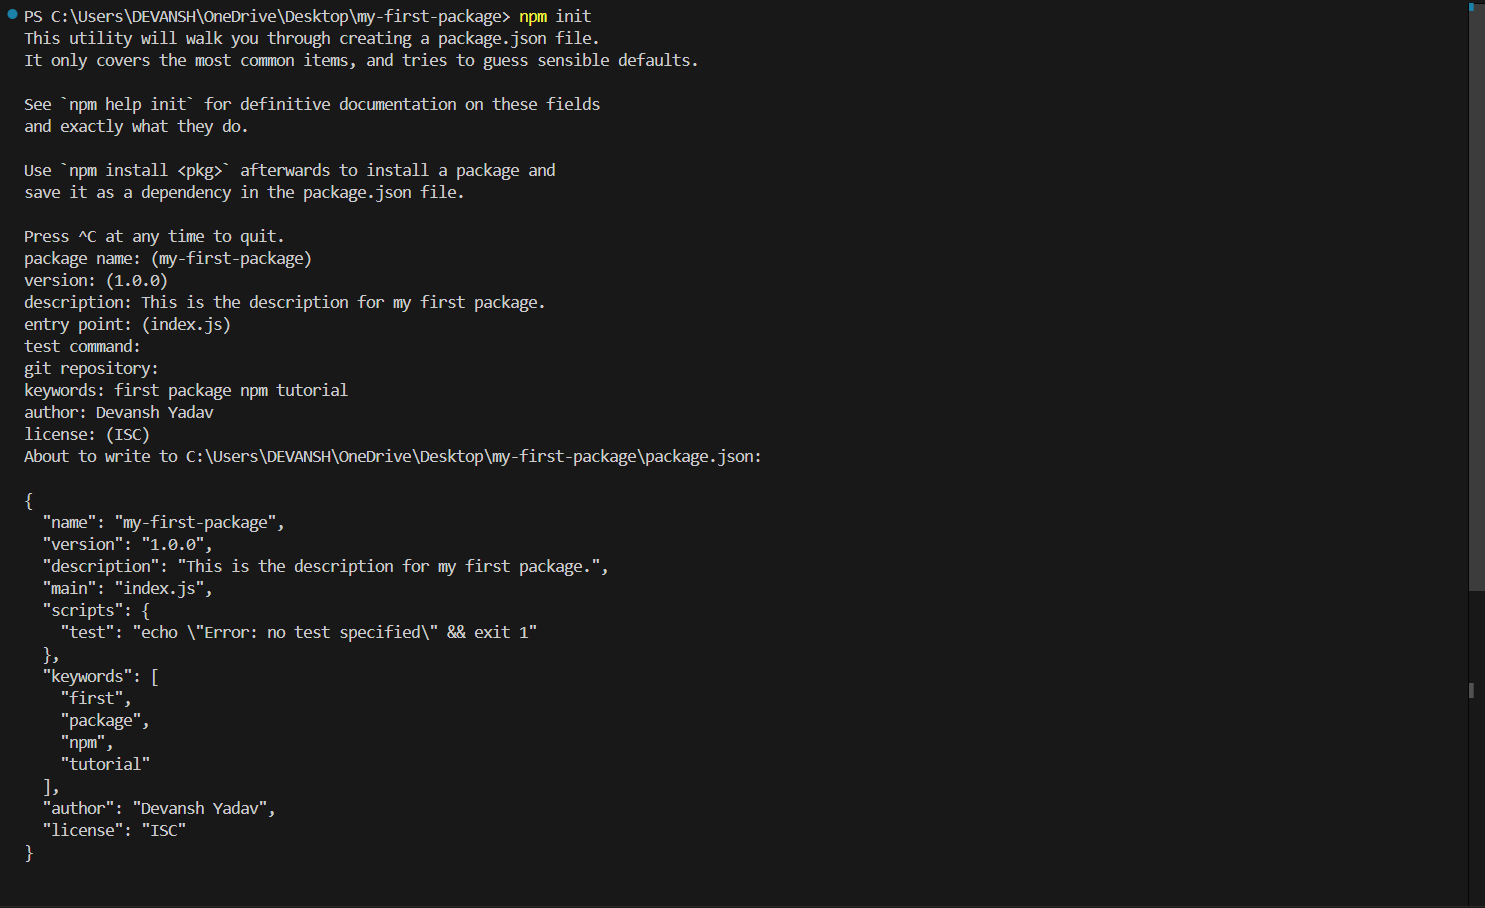
- Run npm init and answer the prompts. You’ll be asked for details like:
- Package name
- Version
- Description
- Entry file (usually index.js)
- Run npm init and answer the prompts. You’ll be asked for details like:
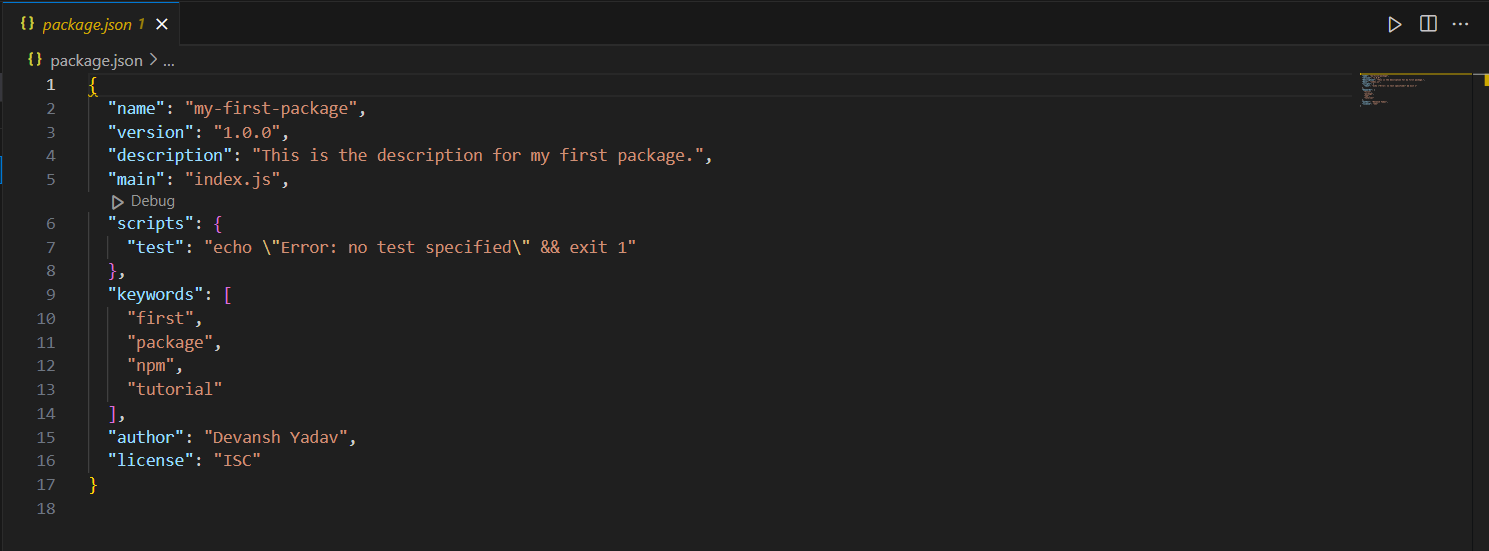
Once complete, a package.json file will be created. This file contains important metadata about your package.


Step 3: Write Your Package Code
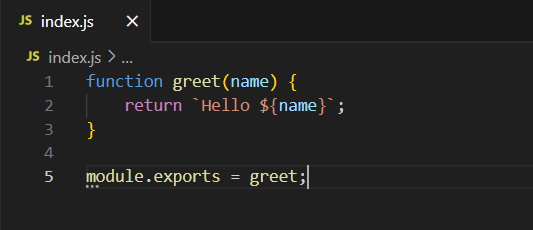
In the folder, create a file called index.js. This file will contain the logic for your npm package.
For example:
- Suppose you want to create a package that greets users by name. Your index.js file should:
- Take a name as input.
- Return a greeting message like, “Hello, [Name]!”

Step 4: Test Your Package Locally
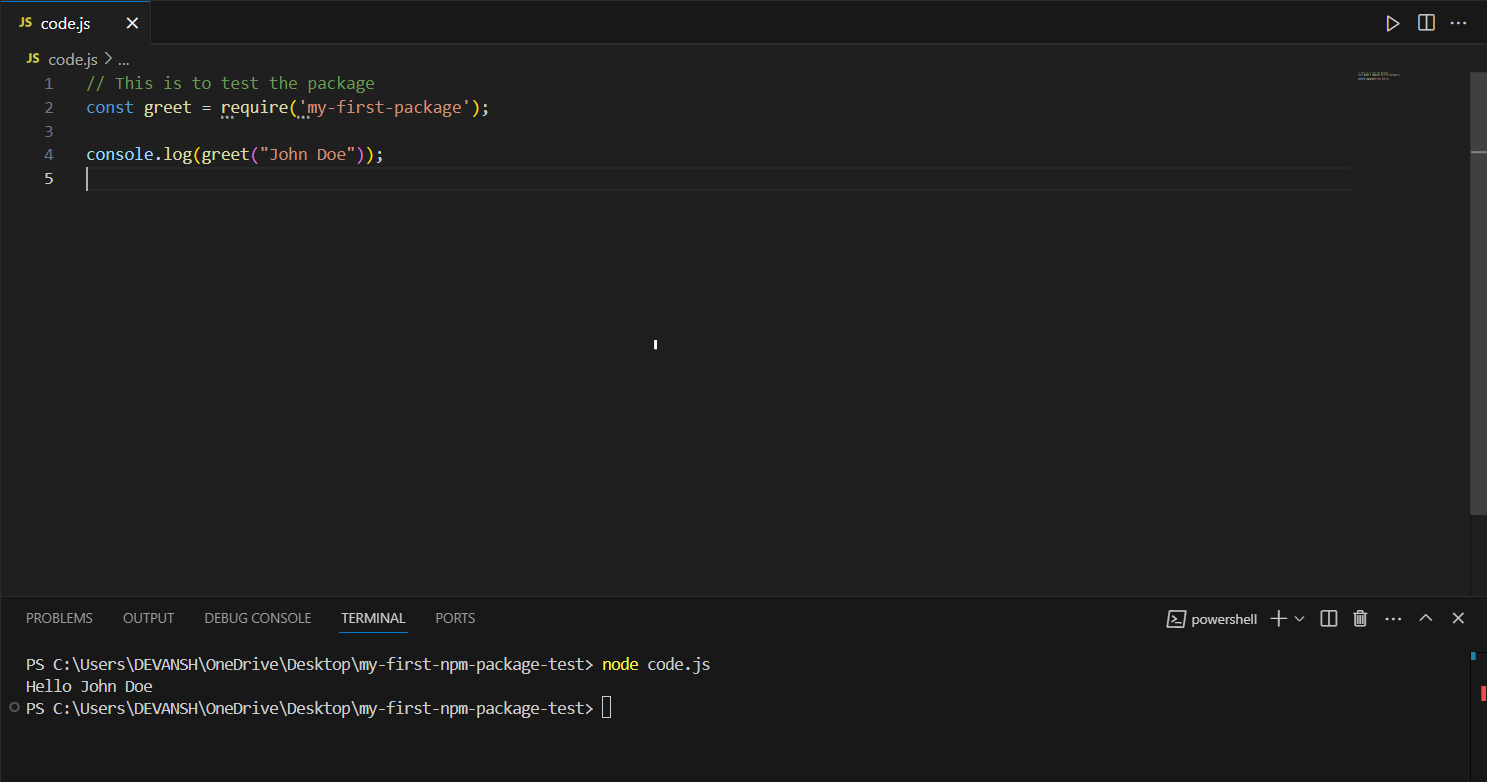
Before publishing, it’s important to test your package locally to ensure it works as expected.
- Link your package globally:
- Run npm link in the terminal. This will make your package available globally on your system.
- Test it in another project:
- Create a new test folder and initialize npm (npm init -y).
- Link your package to the test project (npm link my-first-package).
- Use your package by importing it and calling the function.


Step 5: Prepare Your Package for Publishing
- Update Your package.json:
- Make sure the following fields are accurate:
- Name
- Version
- Description
- Author
- Make sure the following fields are accurate:
- Add a .gitignore file:
- Exclude unnecessary files like node_modules.
Step 6: Log In to Your NPM Account
To publish your package, you need to log in to npm:
- Run npm login in your terminal.
- Enter your username, password, and email address.
Step 7: Publish Your Package
This is the exciting part! Once logged in, publish your package by running:
npm publish
After a few seconds, your package will be live at:
https://www.npmjs.com/package/<your-package-name>
Step 8: Updating Your Package
If you need to update your package:
- Make changes to your code.
- Update the version number in package.json using semantic versioning rules (e.g., npm version patch).
- Republish with npm publish.
Tips for a Successful NPM Package
- Add Documentation:
Include a README.md file with detailed instructions on how to use your package. - Use Keywords:
Add relevant keywords in package.json to improve discoverability. - Follow Best Practices:
Keep your package lightweight, modular, and easy to understand.
Conclusion
Congratulations! 🎉 You’ve created and published your first npm package. You’re now part of the open-source community, making tools and libraries for developers worldwide.
If you found this guide helpful, feel free to share it with others.
